
 This binding was done on my paperback copy of Modern Bookbinding by Alex Vaughan. It was in signatures instead of single sheets glued together so I could easily disbind the pages. I used the existing holes and resewed it on three linen tapes. I left the edges untrimmed.
 Using the colors from the paperback cover I began my design. I wanted to do a binding with pieced inlays of leather.
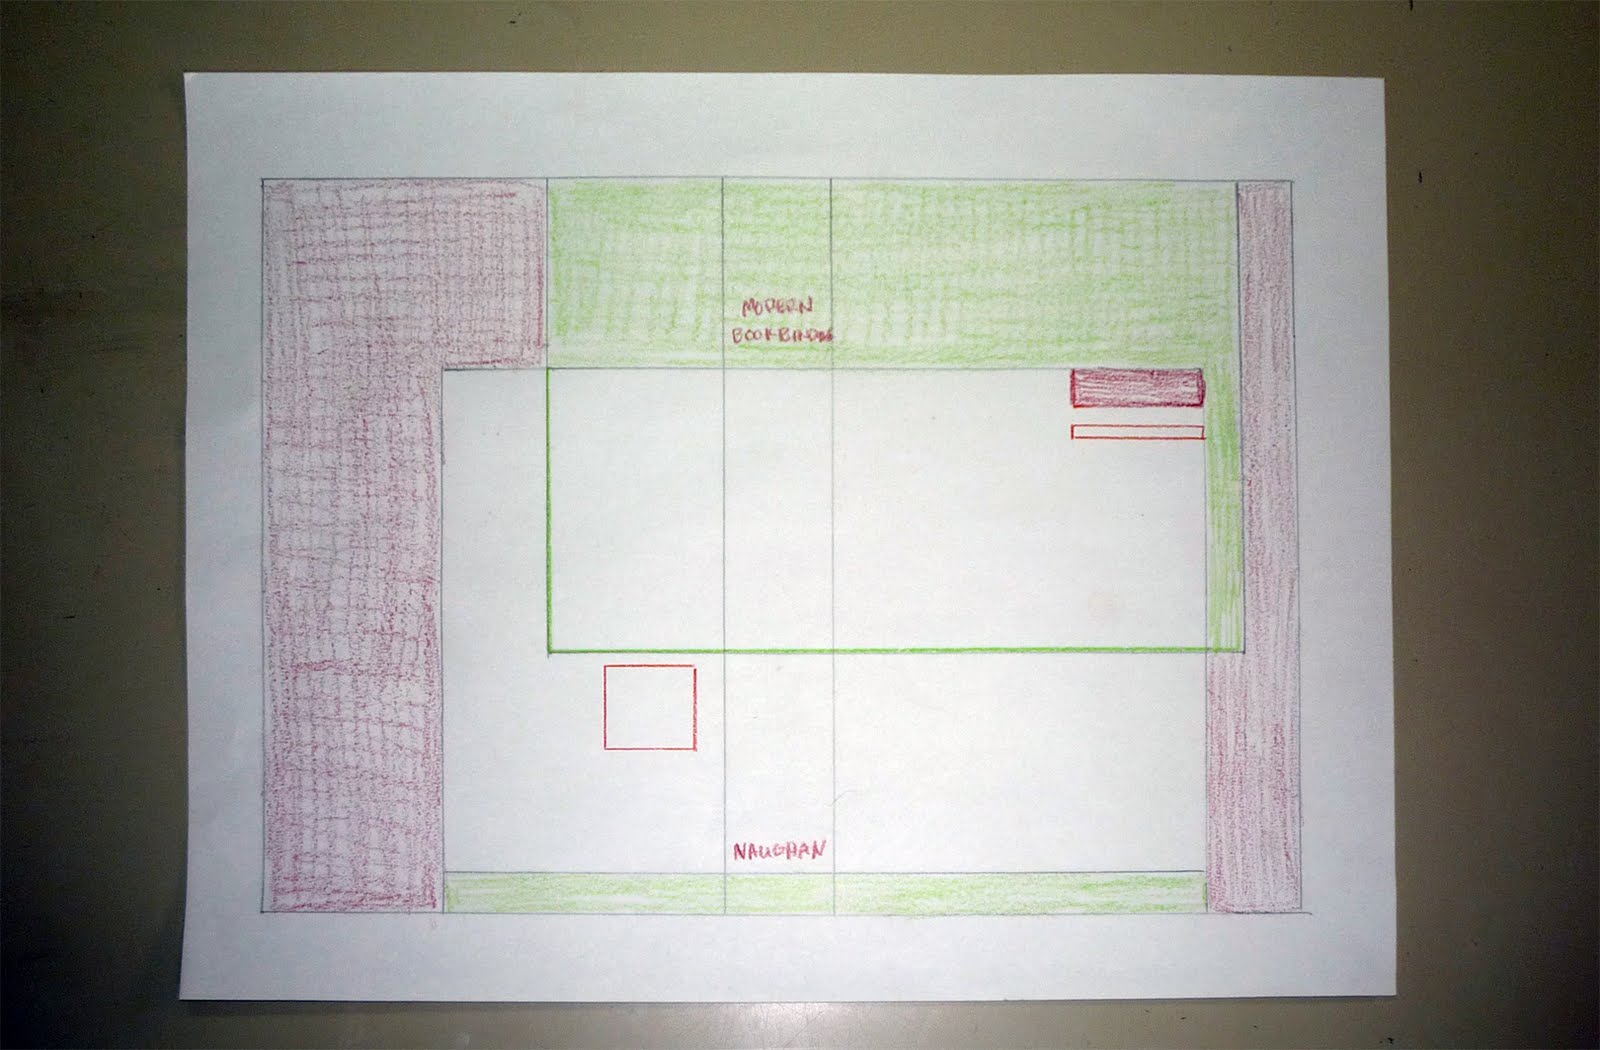 The boards were made from two 1.2 mm Eterno book boards laminated with bond paper between the layers and the inner surface of each board. After attaching the boards, I made a hollow tube spine and added a cord spacer at the shoulder.
 I began to apply the oversized pieces of leather at the head and tail so I could turn the endcaps first. After the leather was dry, I trimmed the leather to its final shape, leaving a beveled edge where other colors of leather would overlap slightly at the edge.
 To remove the unwanted leather, I used water to soften the paste and pulled away the excess leather. In this photo you can see that I should have trimmed this piece closer to the final shape but with some extra water and time, the unwanted section lifted away.

 Moving on to the next section, I trimmed the edge that would butt up to the green leather with a matching beveled edge. The edges were straight so it was easier to trim before pasting onto the boards. When doing curved or more complicated shapes, I leave the first piece slightly oversized and paste the second layer overlapping the first. When the layers are dry you can cut through both layers with a beveled cut and remove the excess leather.
 The red leather I had was a little thinner that the other leathers so I added a piece of thin cardstock where the red would be to level out the final surface once the red was added.
 The red leather in this photo is still damp which gives it a darker appearance.
I trimmed the tan leather to fit between the green and along the edge with the red leather and then trimmed to its final shape.

 After I added the last piece I began to add some line onlays and noticed that some inlayed areas shrank as the leather dried and pulled away from the other pieces of leather. I brushed the area with water and when it soften up I lifted it and pulled it back into place, then watched to see if it stayed as it dried.
 I went back to working on the line onlays when I had more problems.
 As I began working on another line onlay I noticed it was a little off from being square. I retooled the line in the right place but since it was on a light colored piece of leather, I wasn't sure how to correct it.
 Of course the best answer is to simply got rid of it by cutting it out and adding a new color piece.
 To balance the design I cut out a similar shape on the other board and filled them in with the darker red leather. I actually liked the design better with these new pieces.
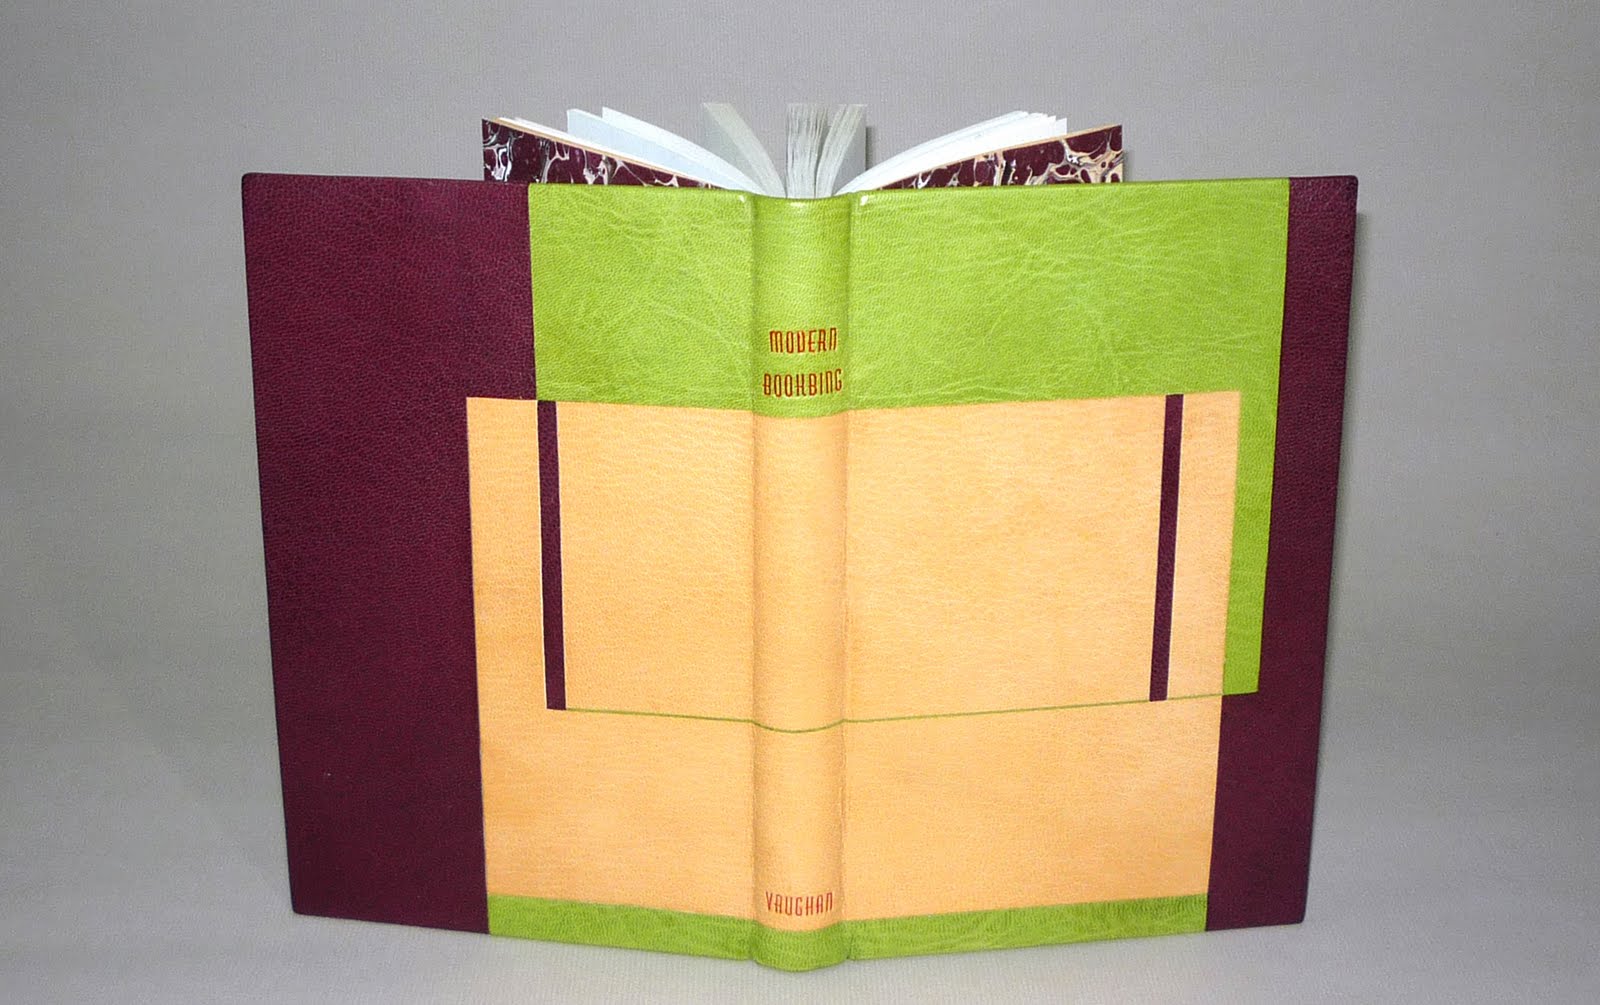
 For the title, I had in mind using a matte red foil, but after tests on some the scraps of green leather I had to change the plan. The foil was not working since breaks and areas were not filling in. The leather took a good blind impression but I did not want a dark brown title. So I used a bright red acrylic and painted in the title and author's name.
 The endpapers were done with a marbled paper drummed on a secondary endpaper of Ingres paper and leather joints.


Hi just thought I'd let you know I've awarded you the liebster Blog. I've found your blog really helpful in the past.
ReplyDeleteKind regards,
Roger Grech papercutbindery.blogspot.com
Hi Jana, I love your blog!
ReplyDeleteThis book is amazing. It reminds me of southwest jewelry inlays.
The colors you chose are also fabulous. Carmel, plum and lime, wow.
Best wishes for more beautiful creations,
tj
Has nobody ever noticed that the title says "Modern Bookbing"?
ReplyDeleteThanks for sharing.
ReplyDeleteBeautiful work, very creative and skilled. I'm just starting out as a bookbinder and have a lot to learn. I've looked through just about all of your posts trying to gleam out of it as much as I can. I noticed on this post and some others you laced the linen tapes, I was wondering did you sandwich the tapes between the two boards then have the tapes come out the bottom?
ReplyDeleteAnyway, great work I've tried my hand at inlays, very tricky
Thanks, Drew