Showing posts with label Bradel. Show all posts

Sunday, March 17, 2013

Bradel Binding -part 3 a Three-Piece Cover Binding


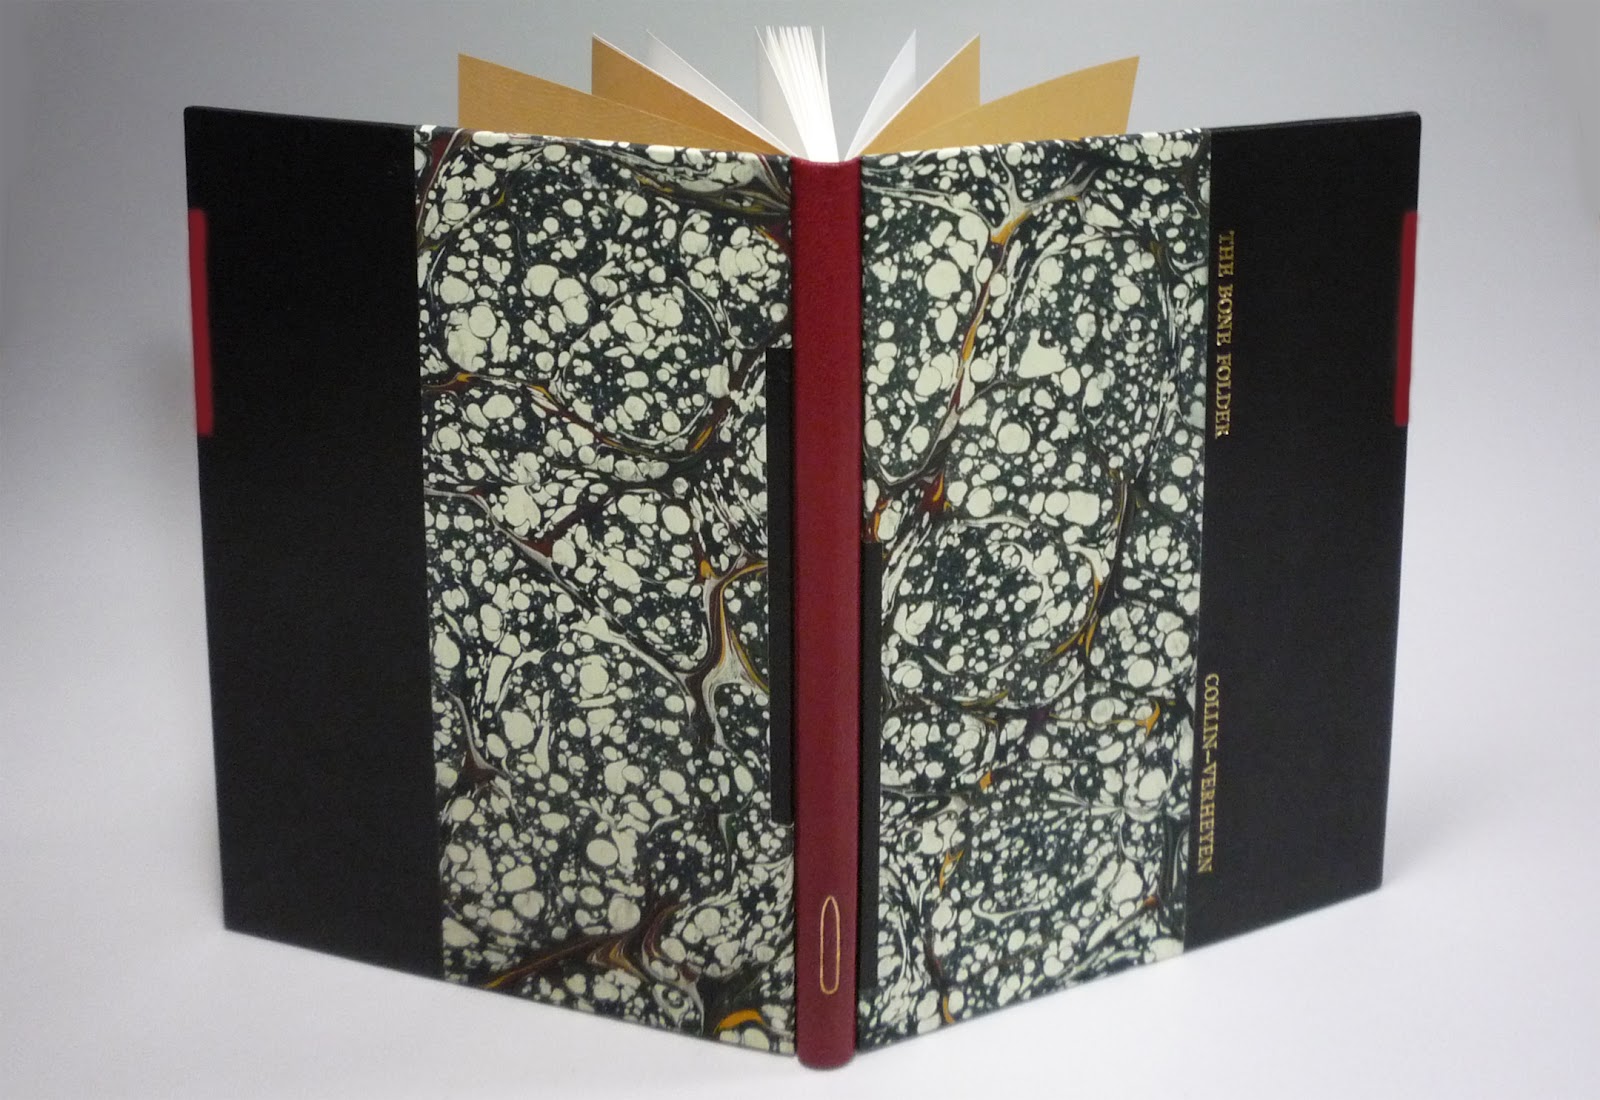
In this version of a Bradel binding, the spine is covered with a separate piece of leather directly on the text block. Then the boards are covered separately with marble paper and leather and are attached to the text block. I have heard this binding called a "three piece binding."


The book was sewn using a link stitch. I added on a blank 2 sheet signature on the front and back of the book. Then I tipped in plain colored endpapers inside the first and last pages, leaving a plain white waste paper on the front and back of the book. This sheet will be used to attach the boards to the book.

I pasted up and rounded the spine, then backed it to a 45 degree angle, two board widths wide. It was lined with a layer of mull and paper similar to how I lined the book in the first Bradel post


For the spine, I prepared a piece of red goatskin by paring the edges and pasting on a piece of Stonehenge paper the width of the spine by the height of the boards. Then I pasted down the head and tail and formed the headcaps. When it was dry, I glued it  down to the sides of the text block, forming a hollow spine


In these drawings, I am trying to show how the  spine piece was the glued at the joint and onto the waste sheet.

In the drawing below you can also see how the cover boards are notched to allow for the thickness of the leather.


I lightly scored the board along the edge then peeled away some of the board. Since the cover boards are attached over the spine leather, the spine edge of the boards needed to be wrapped in the covering material.  


I wanted the foredge and a section of the spine edge of both the boards covered in leather so they were added first.


The marbled paper was then added and turned over at the edge along the spine but the top and bottom edges were left to be glued down later.
I glued an area along the spine edge of the boards slightly wider than the area covered in the spine leather.


I placed the boards on the book block and then using a square to make sure they lined up with each other. Then I put the book under a weight to dry.


By gluing on the boards along the edge, I can then peel off the unglued area and sand down the edge of the paper leaving a smooth surface for the endpapers to be pasted on.  The ends of the marbled paper at the head and tail are then glued in place, finishing the edge where the leather and board overlap. I added an infill and glued down the endpapers.


The titled was stamped in gold foil on the front board and a small outline of a bone folder was done using foil and a cut out pattern and a stylus.


Sunday, February 3, 2013

Bradel Binding -part 2 a Case Bound Pamplet


This version of the Bradel binding is a single signature in a hard case. It was sewn using a four hole pamphlet stitch. Before it was sewn, a piece of book cloth approximately 3 inches wide was folded in half with the cloth side next to the text and was sewn together with the text pages.


I made the case up from two cover boards, a spine piece and a strip of paper to connect the  pieces. The boards were cut to the height of the pages plus 3/16 of an inch, and were cut wider than the page width. After I attached the spine piece I can measure and  cut cover boards to the final width.


I glued the spine board in the center of the paper strip and then turned it over and folded the paper around the board. This allows me to see the position of the spine board as I attach the covers


I decided to use a 1/4 inch joint and used a brass bar to space the cover boards and glued them to the paper strip. The paper was glued to the underside of the cover boards.


To soften the transition of the edge of the paper glued to the board, I brushed an area on the boards about half the width of the paper area. 


After the glue had dried I peeled off the area of the paper that was not glued down and then sanded the edge smooth. This give and feathered edge which will not be as noticeable under the endpapers.


I began putting the bookcloth on by gluing up the cloth and placing  one of the cover boards down while holding the rest of the cover up. Then turning the cover over I worked the cloth into the joint area and then across the other board and turned over the edges of the cloth and glued them in place.


To prepare the inside cloth joint that was sewn to the textblock, I trimmed off the corners at a 45 degree angle.


The hinge needs to be glued down to the cover along the joint area. Because the folded edge of the textblock was round and the spine of the cover was square, it was difficult to glue the hinge in the center while rubbing the cloth down into the inner hinge area.

I found a solution to this problem in an article written by Barb Tetenbaum in the Bone Folder Journal, which can be downloaded as a pdf at http://www.philobiblon.com/bonefolder/vol6no1contents.htm

Taking two book boards cut slightly wider than the book size and placing them between the cloth joint and the textblock, the cloth can be pushed into position for gluing. The extra boards I used here are millboards which come in a green color


I opened up the book and slipped a piece of waste paper under the joint and glued the  hinge. Then I removed the waste paper when the book was closed and the extra boards held the cloth in place.


To finish the inside of the cover, I glued down a piece of marbled paper.


Thursday, January 3, 2013

Bradel Binding -part 1 a Paper Case Binding


This is the first of three posts on the Bradel binding. This style of binding can be traced to 18th century Germany. The origin of the binding is uncertain, but the name comes from a French binder working in Germany, Alexis-Pierre Bradel. It originally appeared as a temporary binding, but the results were durable and the binding had great success in the nineteenth century. Peter Verheyen wrote an excellent description of this binding at http://www.philobiblon.com/casebd.shtml.

My version of the Bradel binding is built on the textblock and is covered in a decorative paper. The top and bottom edges and corners are wrapped with bookbinding cloth to give them extra strength.


I sewed this book on three linen pilaster tapes. I added a blank 2 sheet signature on the front and back of the book. Then I tipped in plain colored endpapers inside the first blank page, leaving a plain white waste paper on the front and back of the book.


I pasted up and rounded the spine, then backed it to a 45 degree angle, two boards widths wide.

The tapes were frayed out and glued down to the side of the text block.
I made the endbands by wrapping a blue cloth around a thin cord and then added them to the spine. The spine was first lined with mull, cut to fit between the tapes, then I cut a second layer of mull the full length of the spine. The final lining was a piece of Arches text paper. When it was dry, I lightly sanded the spine to a smooth rounded shape. 


The Bradel spine piece was made of a paper strip about 3 inches wide and a spine stiffener made from a piece of Stonehenge paper, cut the width of the spine. The length of these two pieces were made oversized so they could be trimmed once the boards were attached.


The two pieces were glued together and then wrapped around a dowel and left to dry. This gave the spine stiffener a curved shape that would fit over the rounded spine.


The sides of the spine piece were glued to the waste sheet on the sides of the text block, making a hollow on the spine.


The boards were cut the height of the text block plus 3/16 on an inch to allow for a small square. The width of the boards was left longer than needed so they could be trimmed after they were attached.

I glued an area slightly wider than the width of the paper of the spine piece and then put the boards in place.  


Then I trimmed the spine piece to fit the height of the boards.


I tore away the unglued section of the outer white waste pages and then sanded it down, leaving a softer transition along the edge of the page.
 
.

After the boards were attached, I trimmed them to the final width. When doing this, I often stand the book on the fore edge to see if the boards are even. If the book leans one way or another the boards are not even with each other.


To prepare for covering the book, I needed to cut the ends of the bradel piece at the joint to allow the covering material to wrap over the boards and behind the spine piece. This was also done on other hollow structures made on the book.


I cut strips of book cloth 1 1/4 inches wide and glued it along the top and bottom edge.
Then after brushing glue on the turn in area, I worked the cloth around the spine piece and around the slits I had cut earlier.

To level out the cover boards, I cut a fill card to fit between the cloth and let everything dry under a light weight.

The marbled paper was cut to fit the height of the boards, leaving a small area of the cloth exposed. I started by gluing up the paper and then adhering it to the front board and working it down along the joint. Then I covered the spine and worked the paper into the joint on the back and then the full board. To finish, I wrapped the fore edges of the book.


The endpapers were then pasted down.